These biscuits are super easy and are always fluffy and really delicious. We use them as a side for almost any meal or as the substrate for tempeh sausage and gravy. If you make this recipe with vegenaise and soy or almond milk, then you can make them vegan in case you have any vegan friends or family members.
2 C. sifted flour
1 T. baking powder
1 t. salt
1/4 C. vegenaise (or mayonnaise)
1 C. soy milk (or almond milk or just regular milk)
1 t. sugar
Sift flour, baking powder and salt. Add remaining ingredients.
Mix till smooth and drop by tablespoon on greased cookie sheet or fill 12 muffin tins two-thirds full.
Bake 18-20 minutes at 375°F.
Wednesday, June 9, 2010

Tempeh Sausage Crumbles
This tempeh sausage recipe has been a hit every time we've made it. It is unlikely to fool any omnivores, but if you have a vegetarian loved one (oh wait, you have several) they will certainly enjoy it, and I imagine you will too. Or just give it a try for something a little different. Consider serving it with biscuits and this gravy. This comes from the Vegan With A Vengence cookbook.
1 (8 oz) package tempeh*
1 tbsp. fennel seed
1 tbsp. dried basil
1 tsp. marjoram or oregano
1/2 tsp. red pepper flakes
1/2 tsp. dried sage
2 cloves garlic, minced
2 tbsp. tamari or soy sauce
1 tbsp. olive oil
1 1/2 tbsp. lemon juice
In a small pan, crumble the tempeh and add enough water to almost cover it. Over medium-high heat, simmer the tempeh until most of the water is absorbed, about 12-15 min. Drain the remaining water and add the rest of the ingredients. Cook over medium heat, stirring occasionally, until lightly browned, about 10 min.
*some normal grocery stores carry tempeh, but a natural food store might be better (and often cheaper).
1 (8 oz) package tempeh*
1 tbsp. fennel seed
1 tbsp. dried basil
1 tsp. marjoram or oregano
1/2 tsp. red pepper flakes
1/2 tsp. dried sage
2 cloves garlic, minced
2 tbsp. tamari or soy sauce
1 tbsp. olive oil
1 1/2 tbsp. lemon juice
In a small pan, crumble the tempeh and add enough water to almost cover it. Over medium-high heat, simmer the tempeh until most of the water is absorbed, about 12-15 min. Drain the remaining water and add the rest of the ingredients. Cook over medium heat, stirring occasionally, until lightly browned, about 10 min.
*some normal grocery stores carry tempeh, but a natural food store might be better (and often cheaper).
Best Tasting Gravy on the Earth
This is without a doubt the best gravy I've ever tasted. I made it for dinner last night with biscuits and tempeh sausage, a dish we haven't had in a while, and it blew my mind all over again.
Spice Mix
2 1/2 c. nutritional yeast*
1/3 c. dried parsley
1 1/2 tbsp. salt
1 1/2 tbsp. dill weed2 1/2 tbsp celery seed
2 1/2 tbsp onion powder
2 tsp. each basil, oregano, thyme
1 tsp. rosemary
In a small, dry, seal-able bowl mix all ingredients well
Roux
1/3 c. soybean oil (i've also used olive oil and vegetable oil with no noticeably difference)
1/3 c. unbleached flour
Heat the oil in a small saucepan. When hot, gently whisk in the flour, stirring constantly, until the mixture develops a nutty aroma and starts to lightly turn brown (Be careful; it burns easily). Set aside.
Base
4 c. water or vegetable broth
1/3 c. tamari, soy sauce or Braggs amino acids
1/4 c. spice mix (above)
In medium pot, bring all the base ingredients to a high simmer. Gradually whisk in the roux and cook to desired thickness. Add freshly ground pepper to taste.
The spice mix makes quite a bit and should provide enough mix to make gravy about 8 times. That said, since the mix is made of all dry ingredients it stores well and the gravy itself is good enough that you will undoubtedly want to eat in on everything. I will include the recipe for tempeh sausage as well as the biscuits we like on separate posts.
*be forewarned that nutritional yeast can be a pain to find depending on where you go. I had to ask an employee and they had to ask someone else. Health food stores may be the easiest bet.
Wednesday, June 2, 2010
Oatmeal Pancakes
I risk flooding the blog with round foods. I think just about every recipe I've posted featured roundness...cheesecake, cupcakes, and now pancakes. I'm apparently going overboard on different kinds of cakes as well. These are good round cakes though, so I will post them proudly.
I don't have photos of the oatmeal pancakes. They're not really very photogenic. if you can't adequately visualize pancakes, go to the Smitten Kitchen blog. Our mutual friend Deb has pictures.
My brother Joel has been known to say that eating pancakes or cereal for breakfast is like riding in the back of a pickup with a funnel in your mouth. He's not impressed with their ability to sustain life all the way to lunch. My views on the subject are not, perhaps, quite so extreme...but they're along those lines.
These pancakes, however, are pretty substantial. Add a couple of sausage patties, a couple of eggs, plenty of butter, syrup, maybe some fruit and a refreshing beverage and you're well on your way to having a moderately sustaining breakfast.
Seriously though, these are very tasty pancakes. They have a nice oat-y flavor and more heft than the average pancake. They also hold up better in the fridge than regular pancakes, so you can make a big batch on Monday and enjoy pancakes two or three times during the week. This recipe uses cooked oatmeal, so you can get double-double frugality points by using leftover oatmeal...which does not keep well in the fridge and cannot be eaten for days after you make it. This might be the only reasonable way to use leftover oatmeal, unless you're planning on hanging wallpaper.
I have to give Deb at the Smitten Kitchen blog credit for the recipe...and as you can see, she has to credit a cookbook for the original idea. The authors of the Good to the Grain cookbook probably got it from somebody else. Sharing is good.
Oatmeal Pancakes
Adapted and just tweaked a little from Good to the Grain
Makes about 18 pancakes
3/4 cup oat flour (you can make this by pulsing rolled oats into a food processor or spice grinder until finely ground; 1 cup of oats yielded 3/4 cup oat flour for me)
1 cup all-purpose flour
2 tablespoons sugar
2 teaspoon baking powder
3/4 teaspoon Kosher or coarse salt
3 tablespoons unsalted butter, melted and cooled slightly (plus extra for the pan)
1 1/4 cups whole milk
1 cup cooked oatmeal*
1 tablespoon unsulphured (not blackstrap) molasses or 1 tablespoon honey
2 large eggs
Whisk the dry ingredients (oat flour, flour, sugar, baking powder and salt) together in a large bowl. In a smaller bowl, whisk the butter, milk, cooked oatmeal, honey and eggs together until thoroughly combined. Gently fold the wet ingredients into the dry ingredients. Using a light hand is important for tender pancakes; the batter should be slightly thick with a holey surface.
Heat a 10-inch cast-iron pan or griddle over medium heat until water sizzles when splashed onto the pan. Lower to medium-low. (This is my tip; I find pancakes impossible to cook well over higher heats. I’ve got more pancake tips over here.) Rub the pan generously with butter; Boyce says this is the key to crisp, buttery edges. Working quickly, dollop 1/4-cup mounds of batter onto the pan, 2 or 3 at a time. Once bubbles have begun to form on the top side of the pancake, flip the pancake and cook until the bottom is dark golden-brown, about 5 minutes total. Wipe the pan with a cloth before griddling the next pancake. Continue with the rest of the batter.
Serve the pancakes hot, straight from the skillet or keep them warm in a low oven. We also found these to reheat surprisingly well the next morning, again in a low oven.
Do ahead: Although the batter is best if using immediately, it can sit for up to 1 hour on the counter or overnight in the refrigerator. When you return to the batter, it will be very thick and should be thinned, one tablespoon at a time, with milk. Take care not to overmix.
* Make oatmeal, if you don’t have any leftover: Bring 2 cups of water, 1 cup of rolled oats and a pinch of salt to a boil and simmer on low for 5 minutes. Let cool. You’ll have some extra oatmeal, which you can eat while you’re cooking.
I don't have photos of the oatmeal pancakes. They're not really very photogenic. if you can't adequately visualize pancakes, go to the Smitten Kitchen blog. Our mutual friend Deb has pictures.
My brother Joel has been known to say that eating pancakes or cereal for breakfast is like riding in the back of a pickup with a funnel in your mouth. He's not impressed with their ability to sustain life all the way to lunch. My views on the subject are not, perhaps, quite so extreme...but they're along those lines.
These pancakes, however, are pretty substantial. Add a couple of sausage patties, a couple of eggs, plenty of butter, syrup, maybe some fruit and a refreshing beverage and you're well on your way to having a moderately sustaining breakfast.
Seriously though, these are very tasty pancakes. They have a nice oat-y flavor and more heft than the average pancake. They also hold up better in the fridge than regular pancakes, so you can make a big batch on Monday and enjoy pancakes two or three times during the week. This recipe uses cooked oatmeal, so you can get double-double frugality points by using leftover oatmeal...which does not keep well in the fridge and cannot be eaten for days after you make it. This might be the only reasonable way to use leftover oatmeal, unless you're planning on hanging wallpaper.
I have to give Deb at the Smitten Kitchen blog credit for the recipe...and as you can see, she has to credit a cookbook for the original idea. The authors of the Good to the Grain cookbook probably got it from somebody else. Sharing is good.
Oatmeal Pancakes
Adapted and just tweaked a little from Good to the Grain
Makes about 18 pancakes
3/4 cup oat flour (you can make this by pulsing rolled oats into a food processor or spice grinder until finely ground; 1 cup of oats yielded 3/4 cup oat flour for me)
1 cup all-purpose flour
2 tablespoons sugar
2 teaspoon baking powder
3/4 teaspoon Kosher or coarse salt
3 tablespoons unsalted butter, melted and cooled slightly (plus extra for the pan)
1 1/4 cups whole milk
1 cup cooked oatmeal*
1 tablespoon unsulphured (not blackstrap) molasses or 1 tablespoon honey
2 large eggs
Whisk the dry ingredients (oat flour, flour, sugar, baking powder and salt) together in a large bowl. In a smaller bowl, whisk the butter, milk, cooked oatmeal, honey and eggs together until thoroughly combined. Gently fold the wet ingredients into the dry ingredients. Using a light hand is important for tender pancakes; the batter should be slightly thick with a holey surface.
Heat a 10-inch cast-iron pan or griddle over medium heat until water sizzles when splashed onto the pan. Lower to medium-low. (This is my tip; I find pancakes impossible to cook well over higher heats. I’ve got more pancake tips over here.) Rub the pan generously with butter; Boyce says this is the key to crisp, buttery edges. Working quickly, dollop 1/4-cup mounds of batter onto the pan, 2 or 3 at a time. Once bubbles have begun to form on the top side of the pancake, flip the pancake and cook until the bottom is dark golden-brown, about 5 minutes total. Wipe the pan with a cloth before griddling the next pancake. Continue with the rest of the batter.
Serve the pancakes hot, straight from the skillet or keep them warm in a low oven. We also found these to reheat surprisingly well the next morning, again in a low oven.
Do ahead: Although the batter is best if using immediately, it can sit for up to 1 hour on the counter or overnight in the refrigerator. When you return to the batter, it will be very thick and should be thinned, one tablespoon at a time, with milk. Take care not to overmix.
* Make oatmeal, if you don’t have any leftover: Bring 2 cups of water, 1 cup of rolled oats and a pinch of salt to a boil and simmer on low for 5 minutes. Let cool. You’ll have some extra oatmeal, which you can eat while you’re cooking.
Thursday, May 27, 2010
Faux-stess Cupcakes
Cream Filled Chocolate Cupcakes

Here's the recipe for the Faux-stess cupcakes that many of you enjoyed at the recent Juli/Elise birthday celebration. For those of you who weren't able to join us, you can now enjoy them at home. For those of you who liked them at the party, you can now have seconds.


I said that the Brownie Mosaic Cheesecake was easy, but had a lot of steps. Maybe that's an oxymoron. I will reiterate the oxymoron here. Regular cupcakes are easier to make than these...and they can be pretty tasty. Cupcakes from Georgetown Cupcake are easier too...unless you count the labor required to earn the money to buy a $5.00 cupcake. Buying a package of Hostess is a lot easier...unless you count the effort necessary to drive to an unfamiliar neighborhood to buy them...so that nobody who loves or respects you will see you debasing yourself like that. But of course, God is always watching...and God will smite you.


Hostess cupcakes taste like sweet brown chemicals. The filling tastes sweet and white and coats your mouth...think of a little Louisiana Gulf coast right there in your mouth. These cupcakes taste irrefutably like chocolate. The creamy filling tastes creamy. If you left it out on a store shelf, it wouldn't last an hour. It would melt down into inedible goop. That's because it's real, actual food. Real, actual food does that. Mysterious white chemicals with polysyllabic names remain perky and foodlike nearly forever. These cupcakes have no frosting. These are slathered with ganache...chocolate melted with butter. You cannot peal it off like a disk of brown Play-Doh and eat it separately. Ganache melts at just below body temperature, so it can be licked off, if nobody's watching...and you're that kind of person.


Maybe "easy, but with a lot of steps" is an oxymoron. Fair enough. There is a continuum between "easy peasey lemon squeezy" and "too fussy to bother with". There is also a continuum between "inedible really but kind of food-like" and "very tasty". Others may use lurid descriptions, eye rolling and groaning..."the best thing I ever ate" and other hyperbole. Those kinds of intemperate descriptions are unscientific. We're scientific around here. (Editors note: Jacqueline defines the tastiness scale. The "very tasty" can be accompanied by a demure stamp of the foot...feet in third position. "Over the top" can also be appended to "very tasty". But since "over the top" can be used to describe things that are not food, "over the top" cannot be used to define
the scale...like the foot stamp, it is only a modifier.) These cupcakes lie at the intersection of the two curves...where the difficulty line meets the tastiness line...at the "for special occasions" point on the difficulty curve...admittedly closer to "too fussy to bother with" than "easy peasy lemon squeezy"...but smack dab on top of "very tasty" on the tastiness curve. Around here, we call that point of intersection "worth it".

Faux-stess Cupcakes (AKA Chocolate Cream Cupcakes from Cooks Country)
CUPCAKES
1 cup all purpose flour
1/2 teaspoon baking soda
1/4 teaspoon salt
1/2 cup boiling water
1/2 cup cocoa powder
1/2 cup semisweet chocolate chips
3/4 cup sugar
1/2 cup sour cream
1/2 cup vegetable oil
2 large eggs
1 teaspoon vanilla extract
FILLING
3 tablespoons water
3/4 teaspoon unflavored gelatin
4 tablespoons (1/2 stick) unsalted butter, softened
1 teaspoon vanilla extract
pinch salt
1 1/4 cups marshmallow creme (not marshmallow sauce)
GLAZE
1/2 cup semisweet chocolate chips
3 tablespoons unsalted butter
METHOD
1. MAKE BATTER Adjust oven rack to middle position and heat oven to 325 degrees. Grease and flour 12-cup muffin tin. Combine flour, baking soda, and salt in bowl. Whisk boiling water, cocoa and chocolate chips in large bowl until smooth. Add sugar, sour cream, oil, eggs, and vanilla and mix until combined. whisk in flour mixture until incorporated. Divide batter evenly among muffin cups. Bake until toothpick inserted into cupcake comes out with few dry crumbs attached, 18 to 22 minutes. Cool cupcakes in tin 10 minutes, then turn out onto wire rack and cool completely.
2. PREPARE FILLING Combine water and gelatine in large bowl and let sit until gelatin softens, about 5 minutes. Microwave until mixture is bubbling around edges and gelatin dissolves, about 30 seconds (microwaves are so unpredictable and fussy, you need to watch this like a hawk). Stir in butter, vanilla and salt until combined. Let mixture cool until just warm to touch, about 5 minutes, then whisk in marshmallow cream until smooth; refrigerate until set, about 30 minutes. Transfer 1/3 cup mashamallow mixture to pastry bag fitted with small plain tip (see note below); reserve remaining mixture for filling cupcakes.
3. ASSEMBLE CUPCAKES Microwave chocolate and butter in small bowl, stirring occasionally, until smooth, about 30 seconds. Cool glaze to room temperature, about 10 minutes. Cut cone from top of each cupcake (see note below) and fill cupcakes with 1 tablespoon filling each. Replace tops, frost with 2 tablespoons cooled glaze, and let sit 10 minutes. Using pastry bag, pipe curlicues across glazed cupcakes. Serve. (Cupcakes can be stored up to two days in an airtight container at room temperature).
Note on pastry bag: A pastry bag is not necessary. Use a sturdy ZipLock plastic bag. Spoon the filling down into a bottom corner of the bag. Snip a tiny bit off of the corner and presto...cheap, instant pastry bag. That's what we did and it worked fine.
Note on cutting cone from top of each cupcake: Use a small, thin bladed knife, like a paring knife. Cut about 1/4 inch from the edge of the cupcake with the knife slanting inward toward the center at about a 45 degree angle. Cut about 2 inches deep in a circle. It's easier than it sounds...and if you Gerber one up, spoon its measure of filling into it immediately and eat it! Once you've extracted the cone of cake from the cupcake, cut off all but about 1/4 inch at the top, to make a little lid. The leftover cones of cake are pretty tasty too. You need your strength to get through a recipe like this. Eat those little cones of cake as you work. The party is still probably hours away.
One last thing: Even if you don't want to go to all the trouble of filling and curlicues, at least make the chocolate cupcakes...frost them with cream cheese frosting or put a little vanilla glaze on them...you can even eat them plain...but honest, they are the best chocolate cupcakes you might ever eat. Would we lie?
Sunday, May 23, 2010
Shakshuka...or...Eggs in a Hellbasket
Eggs poached in spicy tomato sauce
I think that many people fear poached eggs. Many more fear egg poaching. I suspect that those who fear poached eggs are put off because they have been served gelatinous blobs of watery egg white with yolks in the middle...the nice runny yolk being the only truly edible part. I can feel your pain. I'm not a fan of eggs that make me want to reach for a straw.
On the other hand, a well-poached egg is a fine thing. I think that poached eggs are the eggiest kind. There is a purity and simplicity to a nicely poached egg that cannot be approached by other methods. Even soft boiled is less pure. It requires all that cracking and digging out of the shell. Poaching is purity.
Shakshuka is a good way to gain confidence and to confront your egg poaching...and poached egg eating...demons. It's an Israeli dish of eggs poached in spicy tomato sauce. However, the Israelis do not have a monopoly on the eggs poached in spicy tomato sauce market. I know about something called "Eggs in Hell"...or Eggs in a Hellbasket, if you're reluctant to use the word hell...a Tex-Mex dish that's a lot like shakshuka. In fact, the only difference is in the spices, and that difference is not huge.
When poaching eggs in something fairly thick, like tomato sauce, the whites of the eggs don't drift off in strings, wisps and veils through the poaching liquid. The egg is contained reasonably well by the viscosity of the sauce. Also, since you'll be eating the eggs under cover of the sauce, less harm is done if you poke at the whites to see if they're cooked to the suitably non-mucoid stage.
Even if you fear poached eggs, it's worth making Shakshuka or Eggs in Hell. Even if it's only for the fun of announcing what's on the menu for friends and family. Both sound risky, if not downright dangerous. The recipe shown below strikes me as dangerous, actually. It requires a lot of chilis. When we made it the first time, I added a medium pinch of dried chili flakes in place of all of those Anaheims or jalapenos. Even then it was too much for Jacqueline's delicate palate, so the next time we made it without any chili and I added Tabasco at the table. Beware of the chilies and adjust to suit your tastes.
The Eggs in Hell variation would involve substituting some oregano for the paprika, cilanto for parsley, and jack, cotija or queso blanco for the feta. The pitas would be replaced with warmed tortillas. Either way you do the spices, it's very tasty...really, it is.
We got this recipe from Smitten Kitchen. As you can see, she got it from Saveur magazine. Thank you Saveur magazine and thank you Deb at Smitten Kitchen.
Shakshuka [Eggs Poached in Spicy Tomato Sauce]
Adapted from Saveur
Serves 4 to 6
1/4 cup olive oil
5 Anaheim chilis or 3 jalapeños, stemmed, seeded, and finely chopped
1 small yellow onion, chopped
5 cloves garlic, crushed then sliced
1 teaspoon ground cumin
1 tablespoon paprika
1 28-ounce can whole peeled tomatoes, undrained
Kosher salt, to taste
6 eggs
1/2 cup feta cheese, crumbled
1 tablespoon chopped flat-leaf parsley
Warm pitas, for serving
Heat oil in a 12-inch skillet over medium-high heat. Add chilis and onions and cook, stirring occasionally, until soft and golden brown, about 6 minutes. Add garlic, cumin, and paprika, and cook, stirring frequently, until garlic is soft, about 2 more minutes.
Put tomatoes and their liquid into a medium bowl and crush with your hands. Add crushed tomatoes and their liquid to skillet along with 1/2 cup water, reduce heat to medium, and simmer, stirring occasionally, until thickened slightly, about 15 minutes. Season sauce with salt.
Crack eggs over sauce so that eggs are evenly distributed across sauce’s surface. Cover skillet and cook until yolks are just set, about 5 minutes. Using a spoon, baste the whites of the eggs with tomato mixture, being careful not to disturb the yolk. Sprinkle shakshuka with feta and parsley and serve with pitas, for dipping.
I think that many people fear poached eggs. Many more fear egg poaching. I suspect that those who fear poached eggs are put off because they have been served gelatinous blobs of watery egg white with yolks in the middle...the nice runny yolk being the only truly edible part. I can feel your pain. I'm not a fan of eggs that make me want to reach for a straw.
On the other hand, a well-poached egg is a fine thing. I think that poached eggs are the eggiest kind. There is a purity and simplicity to a nicely poached egg that cannot be approached by other methods. Even soft boiled is less pure. It requires all that cracking and digging out of the shell. Poaching is purity.
Shakshuka is a good way to gain confidence and to confront your egg poaching...and poached egg eating...demons. It's an Israeli dish of eggs poached in spicy tomato sauce. However, the Israelis do not have a monopoly on the eggs poached in spicy tomato sauce market. I know about something called "Eggs in Hell"...or Eggs in a Hellbasket, if you're reluctant to use the word hell...a Tex-Mex dish that's a lot like shakshuka. In fact, the only difference is in the spices, and that difference is not huge.
When poaching eggs in something fairly thick, like tomato sauce, the whites of the eggs don't drift off in strings, wisps and veils through the poaching liquid. The egg is contained reasonably well by the viscosity of the sauce. Also, since you'll be eating the eggs under cover of the sauce, less harm is done if you poke at the whites to see if they're cooked to the suitably non-mucoid stage.
Even if you fear poached eggs, it's worth making Shakshuka or Eggs in Hell. Even if it's only for the fun of announcing what's on the menu for friends and family. Both sound risky, if not downright dangerous. The recipe shown below strikes me as dangerous, actually. It requires a lot of chilis. When we made it the first time, I added a medium pinch of dried chili flakes in place of all of those Anaheims or jalapenos. Even then it was too much for Jacqueline's delicate palate, so the next time we made it without any chili and I added Tabasco at the table. Beware of the chilies and adjust to suit your tastes.
The Eggs in Hell variation would involve substituting some oregano for the paprika, cilanto for parsley, and jack, cotija or queso blanco for the feta. The pitas would be replaced with warmed tortillas. Either way you do the spices, it's very tasty...really, it is.
We got this recipe from Smitten Kitchen. As you can see, she got it from Saveur magazine. Thank you Saveur magazine and thank you Deb at Smitten Kitchen.
Shakshuka [Eggs Poached in Spicy Tomato Sauce]
Adapted from Saveur
Serves 4 to 6
1/4 cup olive oil
5 Anaheim chilis or 3 jalapeños, stemmed, seeded, and finely chopped
1 small yellow onion, chopped
5 cloves garlic, crushed then sliced
1 teaspoon ground cumin
1 tablespoon paprika
1 28-ounce can whole peeled tomatoes, undrained
Kosher salt, to taste
6 eggs
1/2 cup feta cheese, crumbled
1 tablespoon chopped flat-leaf parsley
Warm pitas, for serving
Heat oil in a 12-inch skillet over medium-high heat. Add chilis and onions and cook, stirring occasionally, until soft and golden brown, about 6 minutes. Add garlic, cumin, and paprika, and cook, stirring frequently, until garlic is soft, about 2 more minutes.
Put tomatoes and their liquid into a medium bowl and crush with your hands. Add crushed tomatoes and their liquid to skillet along with 1/2 cup water, reduce heat to medium, and simmer, stirring occasionally, until thickened slightly, about 15 minutes. Season sauce with salt.
Crack eggs over sauce so that eggs are evenly distributed across sauce’s surface. Cover skillet and cook until yolks are just set, about 5 minutes. Using a spoon, baste the whites of the eggs with tomato mixture, being careful not to disturb the yolk. Sprinkle shakshuka with feta and parsley and serve with pitas, for dipping.
Tuesday, May 18, 2010
Jewish Wedding Traditions Everybody Should Have
A couple of weeks ago Jacqueline brought home Jewish Weddings, by Rita Milos Brownstein. It was mostly out of curiosity…curiosity spurred by Brett and Mesia’s wedding. There were two traditions in there that we really like.
The first is the Ketubah. Here’s what the book says about it.
 “This one piece of paper is more important than a knockout diamond, a beautiful wedding album, piles of gifts, or a heavenly island honeymoon. This is a gift from the husband to his wife, outlining his obligations to the woman who will share his life. It is a written document assuring respect, dignity, happiness, shelter, and legal and financial rights within the union.”
These are beautiful documents, prepared by calligraphers, and beautifully decorated. There is a general pattern for the contents of the ketubah, but each is unique.
The other custom we like is the yichud. Here’s what the book says about the yichud.
 “A wonderful custom, the yichud, ensures that the couple’s first moments as husband and wife are spent together privately. Friends escort the couple to a private room where a table is set with a snack and a bottle of champagne or wine. I those precious moments the couple gets to share their thoughts and feelings, and most of all, their happiness.”
We kind of drew from this custom when we prepared the little luncheon for Brett and Mesia. We knew they’d be hungry, so we made it a meal rather than a snack. We also knew that they wouldn’t be interested in champagne or wine, so we left that part out.
Here’s what we prepared for them...
Salad of Caramelized Golden Filet Beans, Carrots, and Duck Breast Prosciutto
On a Bed of Organic Baby Greens


 Poached Line-Caught Steelhead Trout
with
Sour Cream and Dill Sauce

 Home Baked Butter Croissants
with
Butter and Crabapple-Rosemary Jelly
 S. Pelegrino Sparkling Water
Orange Madeleines
See’s Dark Chocolate Truffles


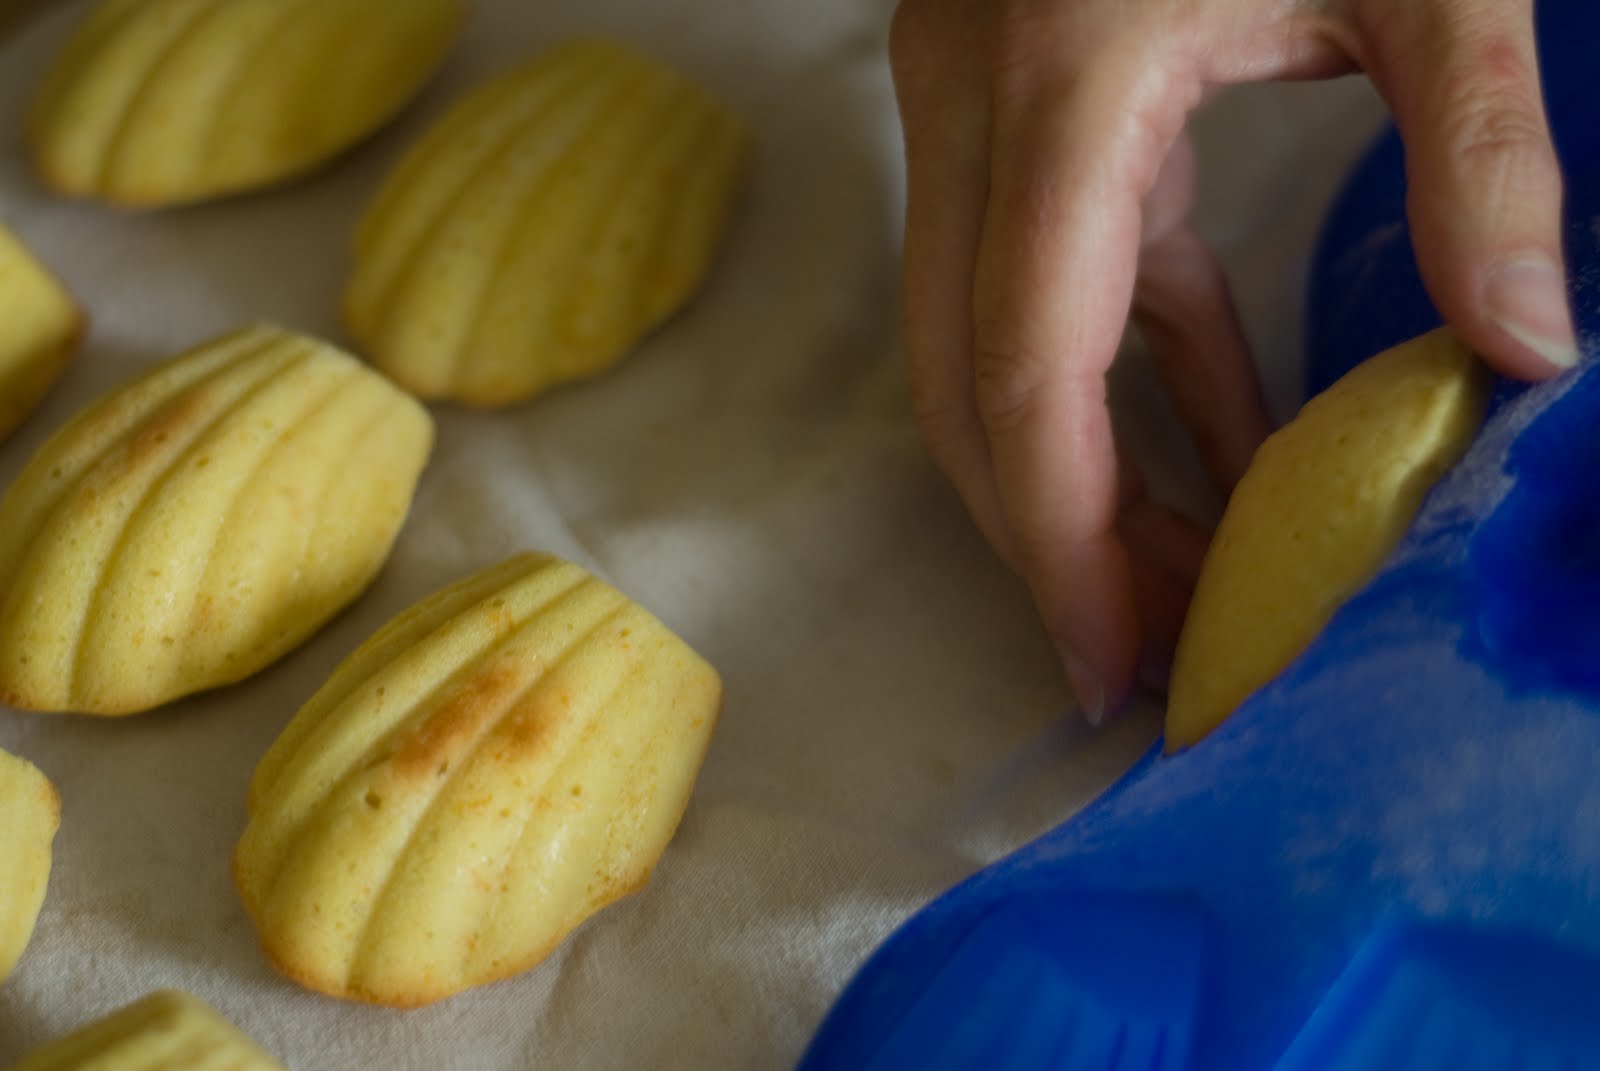 The duck breast prosciutto could have been regular prosciutto di Parma, other quality ham or even pancetta. We liked the duck breast because it’s salty and smoky and has a rich sort of gamey flavor underlying it all. It's also kind of unique. If you want to try it you'll have to contact me. I made it my own self.
 Salmon would make a good substitute for the steelhead trout. The trout seems a little fattier and softer than salmon. Other kinds or trout would work well.
Subscribe to:
Posts (Atom)